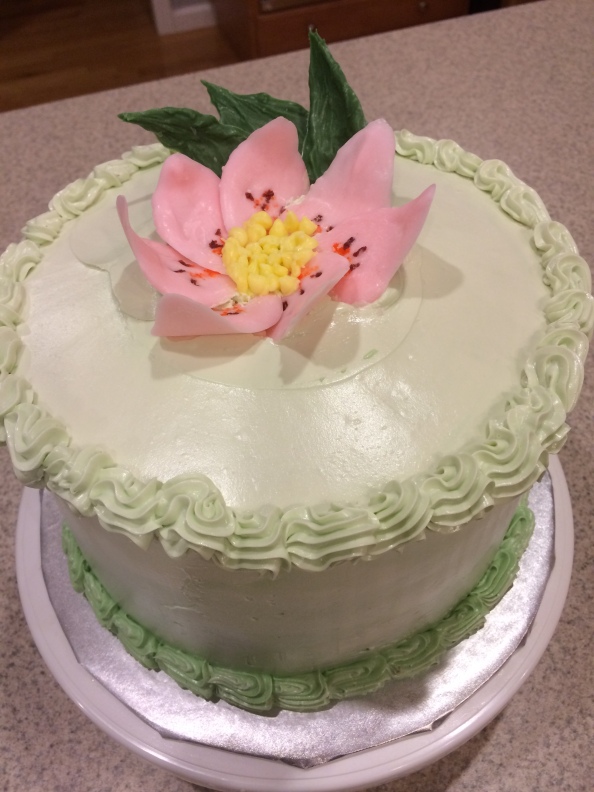
This cake is by far one of my favorites. The taste is like nothing I have ever had in a bakery. This was made for a bridal shower for one of the women in my husband’s office. I was not there to enjoy it or see their faces but it got rave reviews which was just as good. The restaurant staff where the party was held asked which bakery it came from. For me, that is a heck of a compliment.
I will not take an ounce of credit for the recipes, kudos to those that came up with them. Below are the links for the cake and frosting. The design was just something I came up with because I know my limits with piping frosting since I have no training and really don’t know what I am doing there other than having fun. I wanted something pretty on top so we went with a flower. As I have mentioned in prior posts I am much better with the structural design over the frosting detail…I will get there though.
So let me introduce a tower of pure deliciousness…
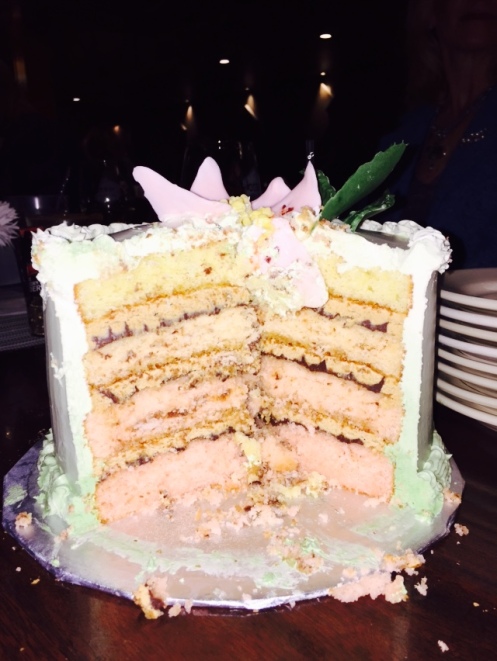
Vanilla Bean Cake filled with Chocolate Ganache and Tiramisu Buttercream…covered in a light fluffy Swiss Meringue Buttercream Frosting.
The Frosting…oh the frosting…I cannot begin to tell you how delicious this is.
Swiss Meringue Buttercream
When I was choosing a recipe, I knew that I wanted to try something other than a traditional buttercream, made with butter and powdered sugar. I was looking for a smoother, more delicate consistency. I was always intimidated by any sort of meringue frosting but honestly I don’t know what I was waiting for. This frosting is not any more difficult than any other, it just takes quite a bit more time and there is the added step of cooking the eggs whites. I was going back and forth between Italian and Swiss buttercream. I opted for the Swiss because there were so many review about it being more stable. As well as that I didn’t want egg yolk, used in Italian buttercream, to influence the color of the frosting.
So from everything I read, there were a number of comments stressing the importance of adding the butter very slowly, allowing each tablespoon to incorporate completely before adding the next. One writer commented that allowing it to whip on high for 15 seconds should do it. I used the advice but I must admit there were a number of additions that it was far beyond 15 seconds. I was multitasking and working on the flower while the frosting was being whipped. I don’t know if the added time helped to ensure the frosting didn’t become runny (another concern with meringue buttercream) but whatever the reason, the recipe worked like a charm. I wanted to do something in the meantime since I am a master (sometimes at fault) multitasker. As you will see there are three cups of butter used in the recipe, all of which needs to be cut into tablespoon portions and added very slowly. It takes quite a while to add at a tablespoon at a time so its likely you would want to find something to do at the same time.
NOTES:
- I only used 2 1/2 cups of butter versus three. I was happy with the consistency and didn’t feel that last stick was necessary.
- A stand up mixer is a must unless you have the patience of a saint to stand in one place for what ends up being well over an hour, start to finish.
- The recipe made approximately 9 cups of frosting. I used just about half of it for this cake and froze the rest for next time. You could easily just cut the recipe in half.
Recipe source: http://sweetapolita.com/2011/04/swiss-meringue-buttercream-demystified/
Additional tips and tricks:
- http://whisk-kid.com/2010/08/how-to-make-swiss-meringue-buttercream.html
- http://americanheritagecooking.com/2014/08/vanilla-bean-swiss-meringue-buttercream/
The Cake….mmmmmh Tiramisu…
Recipe source: http://www.loveandoliveoil.com/2009/12/vanilla-cake-with-tiramisu-buttercream-and-ganache-filling.html
Notes:
- I added a heaping half teaspoon of vanilla bean past in addition to the extract for added flavor.
- I halved the buttercream recipe since I was only using it between the layers.
- I made a traditional buttercream frosting for the Tiramisu buttercream using butter and powdered sugar rather than using the eggs whites called for in the recipe. As long as you add the coffee as called for you will achieve the same flavor profile.
- This was made as 4 layer cake in 8” pans. Divided the batter in 4 2 1/3 cup portions and added soft pink food coloring at varying intensities to create an ombre effect inside of the cake as well.
- I baked the cake at 375 degrees for 18-20 minutes, rather than 325 degrees for 26-28 minutes. I read recently that cooking cake at a higher temperature, for a shorter time helps the cake maintain its height and not deflate. So far, so good with that trick J
- I made the cake a day in advance so I did use a simple syrup when assembling to ensure it was nice and moist.
Assembly
- Add a smear of frosting on the cake plate or cake board if using.
- Place first cake later
- Brush with simple syrup, if using.
- Spread a third of the chocolate ganache on the cake being cautious not to bring it to close to the edge.
- Pipe the frosting around the perimeter of the cake and cover the chocolate
- Carefully spread the frosting, again keeping clear of the edge.
- Top with second cake layer and repeat the process.
- Frost the cake as desired. I did not do a crumb coat in the case, I just didn’t feel it was necessary.
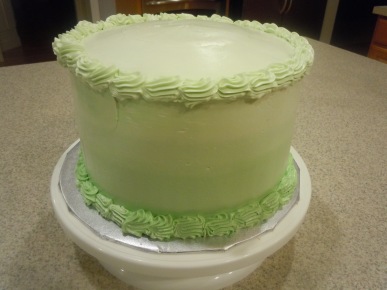
I was originally planning a more decorative ombre effect with the frosting but I wasn’t happy with the way it turned out so I just used a pastry scraper to smooth it out. I’m very happy with the way it turned out although next time I will increase the darkness on the bottom layers a bit more. The flower on top is simply melted white chocolate that I added a bit of food coloring to. I used the back of a spoon to create the shapes on top of waxed paper. I cut a paper towel roll in half lengthwise to create a canal and spread it open a bit. I pulled the waxed paper into the tunnel to create the curve while the chocolate hardened.


Your frosting is so perfectly smooth!!! And all those layers upon layers! Amazing!
LikeLike
Thanks Lindsey! That was the look I was going for. I hope you get an opportunity to try the recipe – It’s a labor of love and so worth it!
LikeLike